Monday, August 21, 2017
Warzone Resurrection Emancipator Combat Aircraft finished

I have finally got around finishing the Emancipator Combat aircraft for Warzone Resurrection and I would like to share it with you. I am quite pleased with the end result and it was a really fun model to build and paint.
Saturday, March 18, 2017
Space Orks Evil Sunz Mek on deff-jetbike

Hello everyone!
Being on a creative spree I have decided to finish my latest project, something which I had a hard time deciding what eventually is, untill you people gave me a revelation. I present to you Mek Gitfixa on his deff-jetbike.


I had always a great thing for conversions, especially orky ones. Orks were my very first Warhammer army and it really got me into modelling and converting all sorts of waky vehicles and individuals. So I decided to rummage my bits box for suitable bits to create a deffcopta model to use in my games.
The main model I used was an old Warzone jeep model (I really don't remember what model though, I will make my research and I will edit this article so keep an eye on this space, unless someone out there finds out earlier so please comment below if you remember :) ). The jet packs are 2nd edition ork pulsa rokkits, the chainsaws in front are Catachan saws from the Catachan Sentinel set, Rokkets are from an 1:48 figher jet kit and various bits from the ork boys sprue, includng the Mek boy itself, with sculpted googles to add character. There are various sculpted parts in the model to integrate all bits seamlessly in the final model.
I went with a typical Evil Sunz paint sceme, staying true to the mythos that Red ones go fasta, a machine like this must definitely go faster than anything else this Mek has ever created, although it will probably kill him eventually. I have tried some flame patterns and checkers both freehand and transfers to add to the final orkyness.
So there you have it. My first finished ork project for a long time, and I hope definitely not the last. I would love to hear what you people think. If you have any questions concerning the overall conversion process I would be happy to help so feel free to hit me with anything in the comments below. As always I would love to see your votes on CoolMiniOrNot
Till next time, take care!
Thursday, September 1, 2016
Carnival of Chaos Plague Cart

 |
| the original model that Games Workshop released |
Not so long ago, I have purchased my own 3D printer and since then I had a ton of fun creating all sorts of things, so I have decided to use it for this project as well.
I have found a nice file over the internet for a carnival cart and I decided to use this as a base model.

The end model have been extensively converted and modelled to create that slimey and rotted look that papa Nurgle always favors. The driver is based on a plastic Skaven model with lots of sculpting to create the robes. Tiny bits and pieces were added to the cart, trying to avoid going overboard. I wanted to keep that one simple yet full of character.


 |
| clickie for biggie ;) |
Thank you, till next time, take care! :)
Tuesday, June 21, 2016
Skaven Chief Warlord Engineer Ikit Claw
Anyways, here I am once again, finally managing to finish something off. Something I was building for quite a while now. You have probably by now seen my Skaven army building up through the pages of this blog. If not, do so now ;)
In any case, I have always been fascinated with one of the most infamous Warhammer characters, the great Skaven Chief Warlord Engineer of Clan Skyre, Ikit Claw. Being a long time Skaven collector, I happen to have the old model of him, not that I dislike the newer version but as I always like to say, no school like old school! I always loved the character and the extreme details that this model have.
But let the pictures just do the talking, I guess


Wednesday, January 20, 2016
M5 British Halftrack 3D printed
Following my last post on my 3D printer I am happy to give you an update on my progress so far with this wonderful machine.
After many test prints I have managed to build my first fully 3D printed model. The M5 British Halftrack.


Till next time, take care!
Wednesday, January 30, 2013
Nurgle Rhino, who said paper tanks can't be sexy?!

So following my latest post about pimping my old paper Rhino I stayed up late tonight to finish painting the little fella. Yeah, thats right, this is a paper model made from scratch using some online templates I have long lost (although I'm sure that a google search would bring up quite a few results) and a raid over my bitz box! I think I'm gonna try making a Vindicator as well! :P


So there you go! Hope you like it as much as I do! Any comments are more than welcome! Don't forget to pop me a vote on CoolMiniOrNot as always!
Take care and listen to great music!!
Sunday, February 20, 2011
Our new Warhammer table and Terrain!


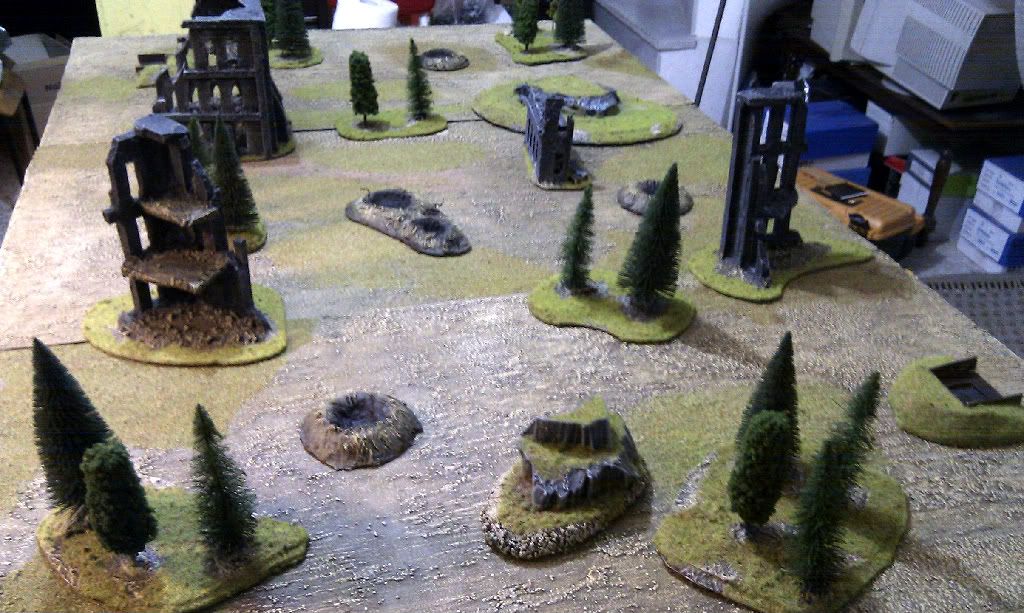
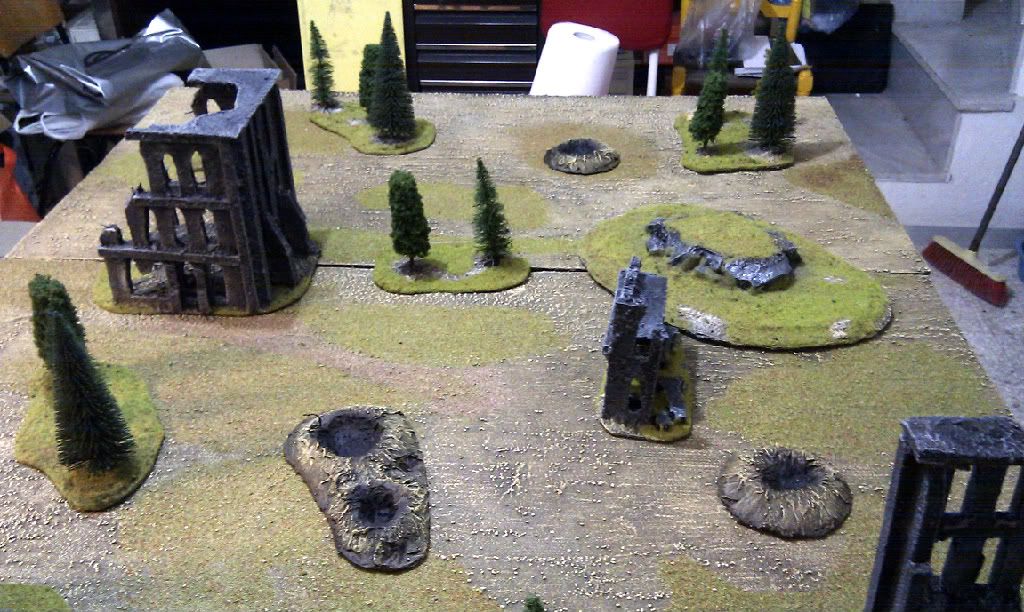
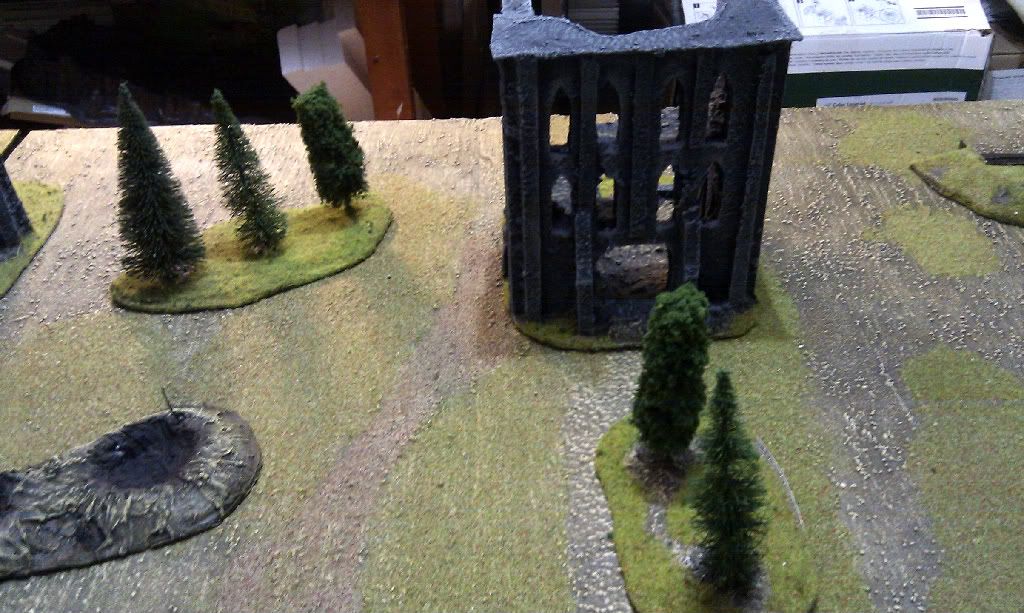
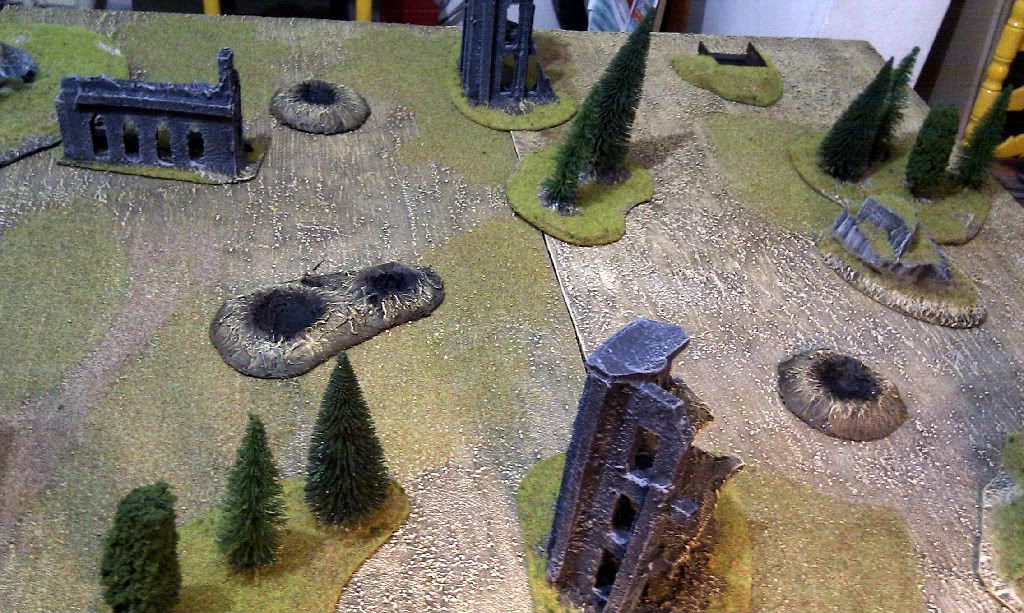 |
So what do you think so far? Any terrain ideas you would like to share?
Thursday, March 11, 2010
Battlefortress WIP Part 4, time to throw some paint...!
Hi there everyone! I thought that I shoould post the next part of my Battlefortress WIP and this time is painting!
I thought that from the way the construction went and the shape of the vehicle finalized to a racing overall pattern (you know with the racing fin at the back - hope that I got this correct :P ) I thought that a GO FASTA red Evil Sunz pattern with some nice flames would be appropriate! So there it is, the monstrosity painted up!
Still there are quite a few things to be touched up and finish the project but more on this on the final part of this WIP marathon! :P


The crew :


Would love to hear your comments!
Thursday, February 25, 2010
Ork Battlefortress part 2
As promised, here are some more WIP pics on my Battlefortress. The thing with this construction (as with all of my constructions as a matter of fact :P ) is that I didn't have a specific plan in my mind so I cannot post a reliable step by step guide. You'll have to figure things out of the pictures.
To make things a little bit easier I have dug out some older WIPs (before the armor plates were fixed) to give you an idea what I mean.


As you can see I have used a ton of bits from various sources including some 1:35 kits (the track system of a Sherman, a british WWII transport (I always forget its name :S) and some Panther tracks (kudos to the Antipope that figured out how I have created the deffrolla with the upside tracks. The thing that he couldn't figure out (and I bet noone can) is the fact that the main body of the deffrolla is taken from AXE Deodorant bottles :P

yes, its the top of the bottle ... :P
Hmmm, what else I can remember, ah yes... There is also a toy bulldozer in it, its the yellow parts and I must say that it fit the built perfectly.
So stay tuned for more updates as I continue the search of my Battlefortress dark history... :P
Support this blog

Popular Posts
-
 And yes... my first painted model for such a long time its a reality at last!! I can't believe how much I have missed painting, so m...
 -
 Hello to everyone! So here I am, getting dynamically back on track, rebuilding my Imperial Fists force (or rather adding more choices to ...
 -
 Hello everyone After what seemed (and probably was) a lifetime of hiatus this is my latest blog update. I hope there are still people ...
 -
 Helo again! I just couldn't let this bad boy WIP for long and got it finished today! I have tested myself to several new things on thi...
 -
 Hello everyone! Its so good to be back on my table and this time I decided to build something that I'm going to need for an upcoming to...
CoolMiniOrNot Uploads
 My rank is
Blogs I Follow
-
-
-
-
General Update10 months ago
-
-
Röknauts Revolution2 years ago
-
-
-
-


