Photographing minis
Hello again!
From the Warp Blogspot will have a collaborative post running on photographing miniatures so I have decided posting an article on how I photograph my minis.
I must say that my photographing skills are rubbish. Only recently I have managed to start playing somewhat succesful with my camera's settings and stop shooting everything in auto... The past years I have gathered ideas and tutorials from around the internet and I have narrowed to some things that I think work for me
The most important thing in my opinion is the original lighting... no matter how great skills you have in Photoshop, you cannot create a great pic out of a crappy shot. Therefore I decided to create my own lightbox...
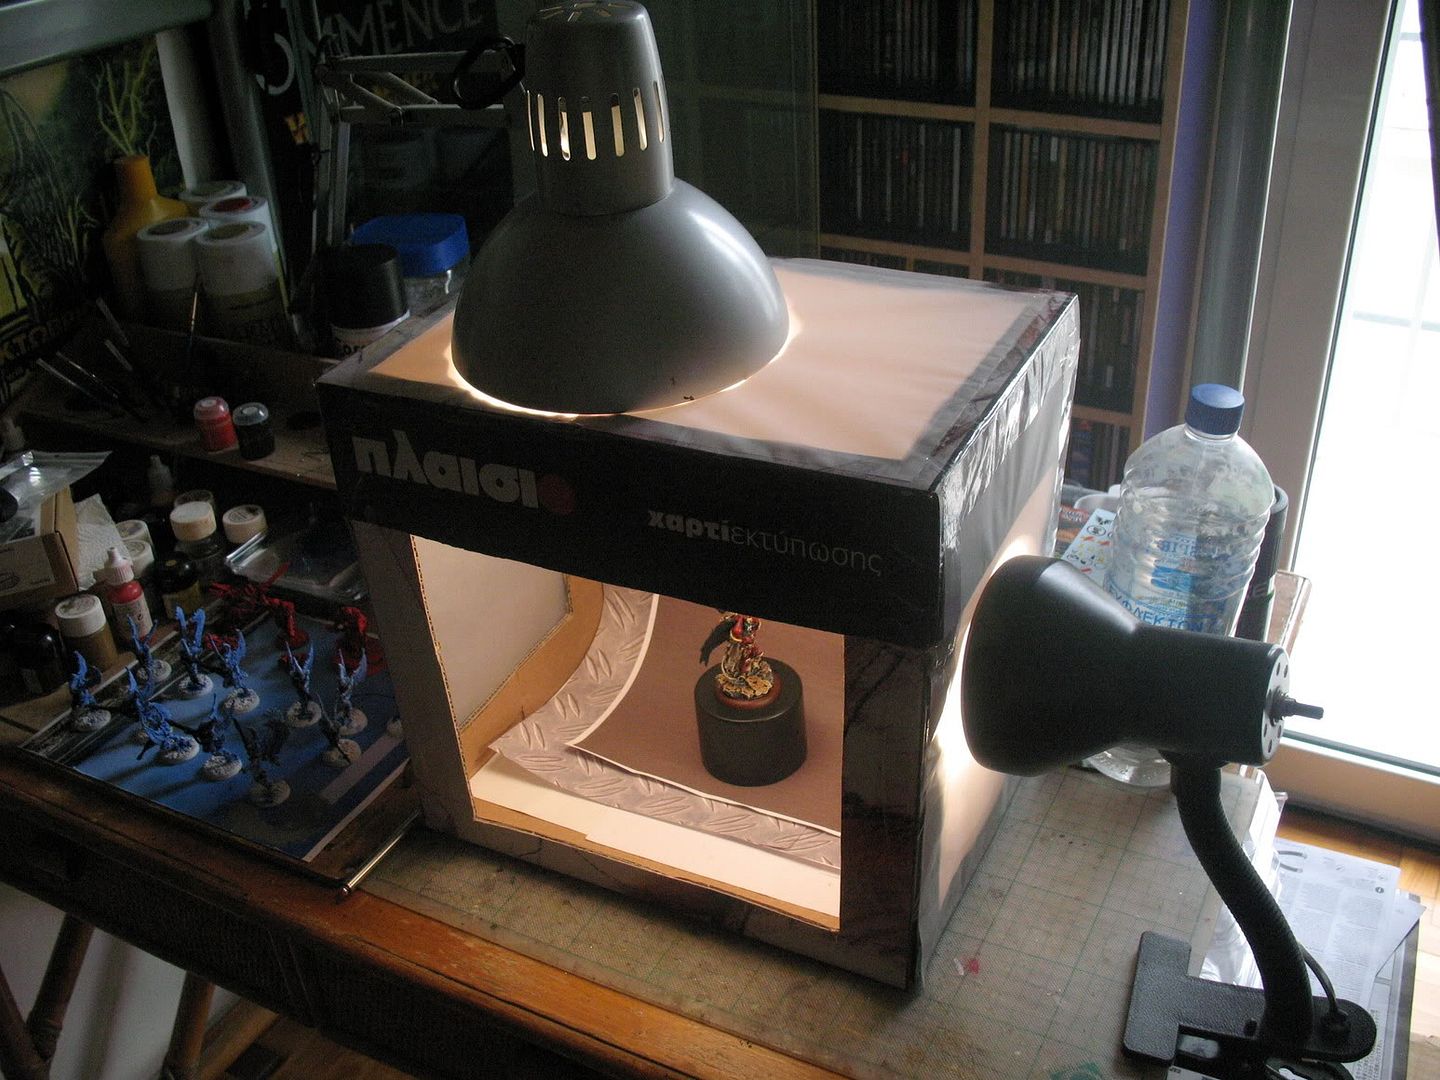
This is how my lightbox looks like
As you can see, its just an ordinary cardboard box. I think that the size of the usual A4 paper box is the best for a similar lamp setting. For bigger boxes you would need bigger lamps I guess...
Anywayz, I took the box and created square holes in each side of it. Next thing is to cover the holes with white tissue paper (any kind of semi transparent kind of paper would do actually) so as to blend the light smoothly. Just leave the front hole free (obviously...)
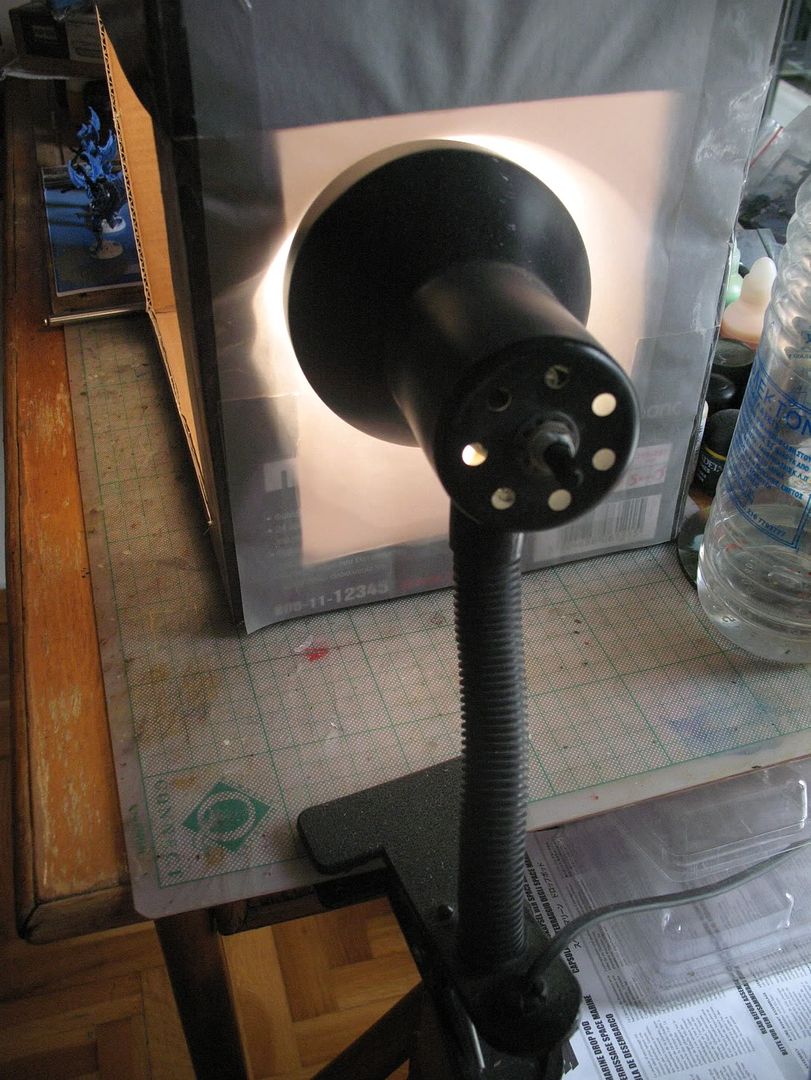
Next thing is to start playing with the light. I got 2 lamps loaded with 80Watts daylight bulbs which are pretty much ok although I should start trying using a 3rd one I guess, or stronger bulbs. I have arranged them in this way, although again I'm open to suggestions here as it seems that there is room for improvement.

Finally I have printed several backgrounds with my latest one being this brownish that you all see featured in my latest minis. This is something personal for everyone but I feel that 2 colour gradients work better.
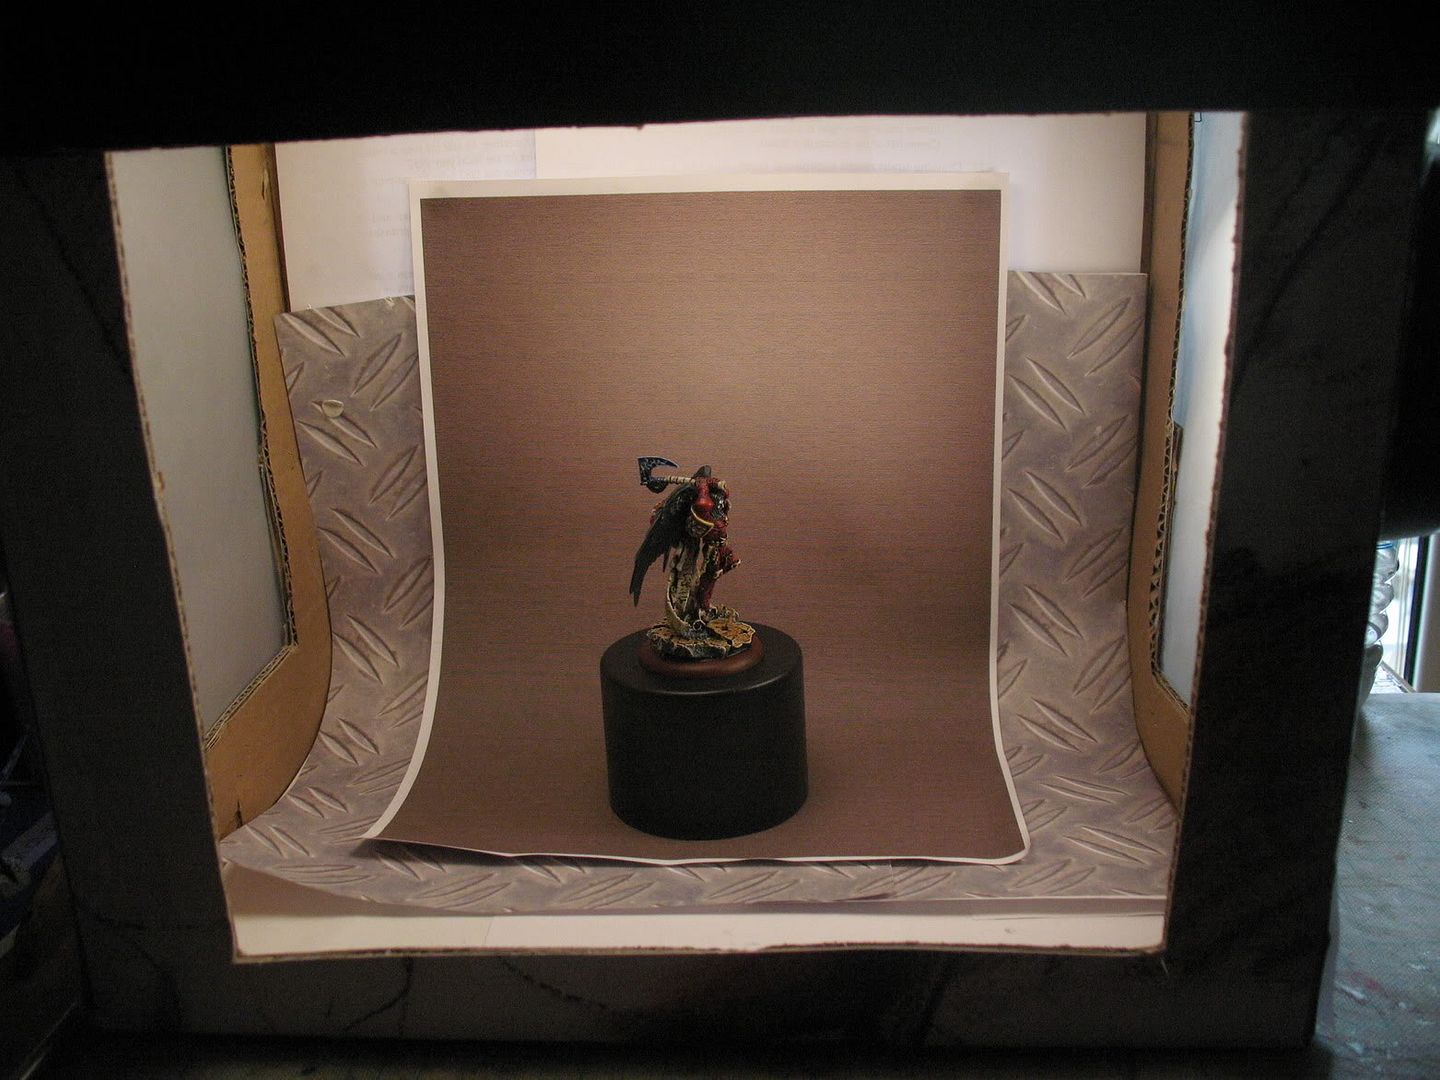
I have also experimented with texture patterns as the mettalic plate that you see in the back of the brown one, I have the feeling that it isn't that effective as it distracts the eye from the centerpiece of the photo which is the model itself.
Finally I must give you the link to the articel that really inspired me in setting all this straight : http://strobist.blogspot.com/2006/07/how-to-diy-10-macro-photo-studio.html
That was my photographing experience presented in short, I would be really grateful if you could help me improve in any way!


As you said I believe the light isn't enough. Buy more powerful light bulbs.
ReplyDeleteAlso don't use one on the left and one on the right. This way they cancel each other out and don't create shadows on the miniature. If you are using a light source on the top, it doesn't have a counterpart.
Yeah, I will get more powerful bulbs for sure, as for the 2 light sources I think that I should try arranging them slightly different, or maybe using both from the top, doubling the light source... dunno, I will have to experiment more.
ReplyDeleteNice lightbox! I was thinking of building one for some time but... I'm lazy beyond excuse.
ReplyDeleteThanks! Its really easy and fast to create! You should give it a try!
ReplyDeleteThanks for all the great advice, I'm running out of excuses for why my pictures don't look any better. Thank you for the help!!
ReplyDeleteNo problem! As soon as this collaborate post starts to roll I will also post any great articles that will come my way.
ReplyDelete